Thursday, April 9, 2015

Country Cottage Update


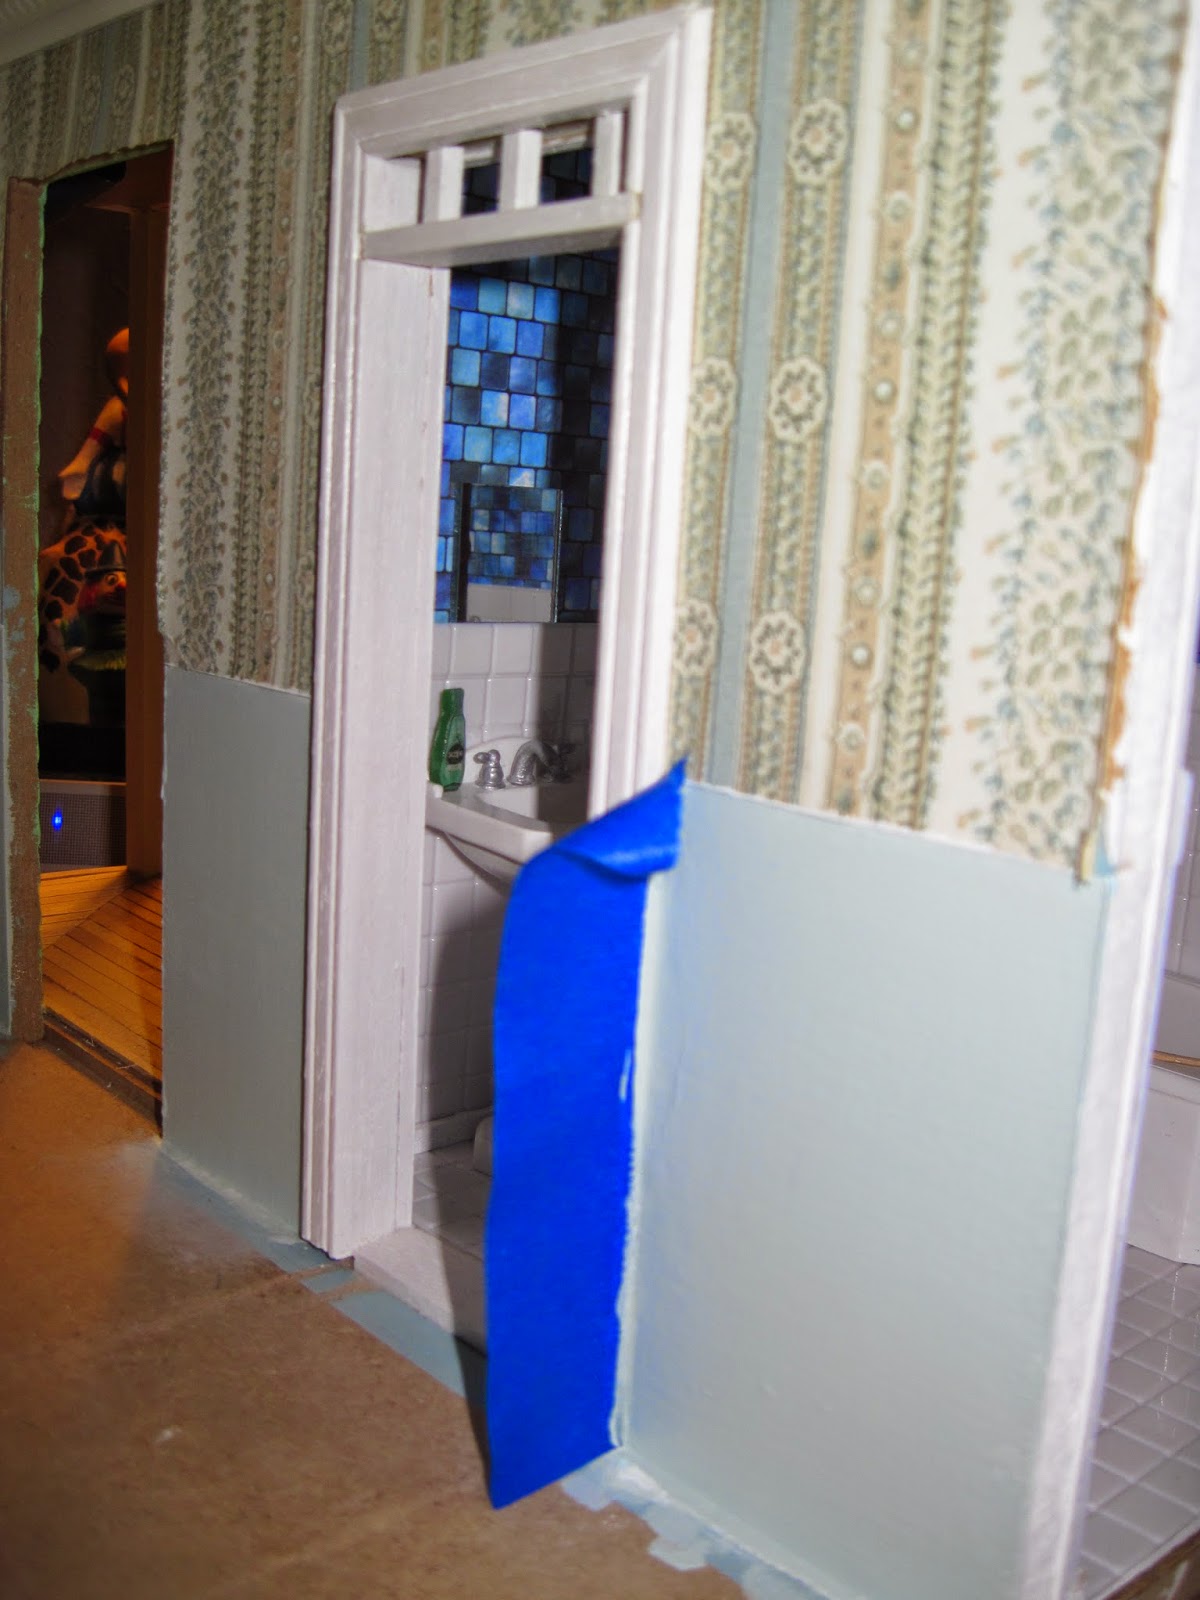
I decided to pull the Country Cottage kit out again and do some more work on the bathroom addition.  If you remember from earlier posts I expanded the kit so I could add a bathroom.  I added walls out to the edge of the porch, but the bathroom was still so tiny.  So I made my own sort of base that was as tall as the porch and then added walls and siding.  It has been sitting and gathering dust for months while I was in school so I decided to finally paint it to match the rest of the house.

Next I'll probably try staining the porch and finished painting all of the trim white.


The modern bathroom that I bought fits perfectly and I wanted to see what how my bathroom accessories looked as well.  I haven't glued anything down yet so I just used glue dots to place the towel bars, toilet paper holder, and soap dish (which you can barely see on the tile over the tub).  I don't have a finished medicine cabinet yet so I propped up a mirror on the tile for the picture.  In the above scene maybe the cottage's future inhabitant is just moving in and is stocking up supplies.  She has no shower curtain or towels yet!  I think the coupon minis look so cute though!!!  I also love the tiny toothbrush in the plastic tumbler on the sink.  I will have to look for some bathroom rugs though - there is just so much white!  Or maybe once I have a shower curtain it will help as well.  Now I just have to figure out how to make one...


I also decided to repaint the bottom walls in the living area.  I liked the blue, but it didn't match the blue in the wallpaper as much I would have liked it to.  So I took a piece of the wallpaper to Michael's and matched it up with Martha Stewart's Cloud satin paint.  I like the new blue tone much better and I can't wait to find a pretty patterned piece of wood to make a chair rail out of.  And of course I'll also need to add a border around the bottom.

Next I'll probably start working on my kitchen cabinets again.  I'd like to get them hung so I can see just how much space I really have to start decorating with :)

Thursday, April 2, 2015

Spaghetti dispenser

The other day at the pharmacy one of my coworkers who was working production found an odd sized desiccant that I had never seen before.  I can't remember what drug this was in - maybe the Topiramate 50 or maybe not because those bottles seem really small (I'll pay more attention next time).  I loved the tall cylindrical shape and figured I could find some use for it.

When I worked at the mall (a thousand years ago - my first job!) we had this lovely glass straw dispenser.  You pulled the lid up and all of the straws kind of spun out of the top.  It was very pretty with a shiny chrome lid and for some reason I just loved it.  I've always wanted one myself (not that I need that many straws) and I thought another use for it might be a pretty way to display spaghetti noodles on the kitchen counter.  We eat spaghetti almost once a week around here, it's cheap and fast - perfect for our budget and easy after a long shift at work.


So I went to work digging through my beads and jewelry findings to make the inner workings of a mini straw/noodle dispenser.  I took two small round burnished silver filigrees and  used my needle nosed pliers to bend the edges around the top and bottom of an unopened desiccant to make the base and the lid.  To make a little handle on the lid I added a silver daisy spacer.

And for the inside I cut a piece of silver jewelry wire (sorry I don't remember the gauge) and glued the top of the wire to my lid and added a drop of glue into the daisy spacer.  For the bottom piece that the straws/noodles sit in I used a small silver filigree bead cap that I smashed flat with my pliers.  I then added another daisy bead to make it a little more sturdy and also to have another space to add glue for extra support.


Here is my finished product.  After you cut a hole in the top of the desiccant to empty the insides it makes it easier to get your scissors down in there to cut the tube down to the height that you want.  Its a little wider than a real straw dispenser would be, but in a mini scene I don't think anyone will notice.  The spacers helped to hold the glue so that everything moves perfectly when you pull the lid off.


I don't have any mini spaghetti so I just grabbed a real noodle out of the cabinet and snipped it into mini pieces.  A real spaghetti noodle is about 10 inches long, but mine are probably closer to 8 or 9 scaled inches because I cut my dispenser a bit shorter to try and approximate the size.  I guess I could roll out some really thin yellow clay and make more realistic mini looking spaghetti, but that will have to be for another day.


And voila!  We're ready for a mini spaghetti feast!


And this is just a bonus pic, but I wanted to share how cute my noodle dispenser looked next to my mini colander.  This is one of my favorite pieces ever and it was handmade by Lori - you can find her etsy shop at 
I may go back and make a couple more of these - especially if I can find a tutorial for making 1:12 scale straws!  And of course the metal findings could always be painted to match whatever color is in the mini kitchen where they will be displayed :)

Happy Thursday blogland!