Monday, January 23, 2012

Train scale...

I've been wanting to try out train scale for a while now.  I've checked out a bunch of different kits online and the two scales that I am interested in are HO (1:87) and N (1:160).  I have been watching this particular kit on Ebay and finally found one that wasn't $40 before shipping.


Woodland Scenics Maple Leaf Cemetery #S131.
An 8" x 11" scene which includes; basswood tool shed; basswood fence rail; eight trees (with two colors of foliage); four colors of grass and soil; two colors of foliage for bushes and weeds; and over 40 white metal castings including stone fence posts, stone walls, gates, two men, a central monument and 28 tombstones with names.

Remember the movie Beetlejuice?  I loved the scale model of the town that the Maitland's had in their attic.


This pic doesn't belong to me - I found it on this forum:
http://www.therpf.com/f9/beetlejuice-house-model-finished-pics-page-2-a-88464/.  The person who wrote the post was looking for pictures of the Maitland's home in order to make a model of the house.

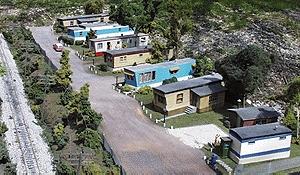
Another kit that I've seen that I adore is this one - 


But I had better see how well I do with the Maple Leaf kit first!  I'll post pics as soon as I've started.  Happy Monday everyone :)


Friday, January 6, 2012

Food for Thought Friday


Jessie's Best Breakfast

Ingredients:
1 thick piece of Texas Toast
2 eggs
1 slice of bacon
shredded cheddar cheese (as much as you like)
1/4 tablespoon lemon juice
1 tablespoon butter melted (or 2 tbsp. if you prefer)
pinch cayenne pepper
pinch salt

Most of this recipe is really simple things that everyone already knows how to do so I won't go into detail on those.  The hollandaise sauce is what really makes this recipe yummy.  David doesn't care much for it so I had to tweak my recipe in order to make "hollandaise for one."

1.  Take one of the eggs and separate the egg yolk from the egg white.  The easiest way I have found to do this is to break the egg in half and pour the insides back and forth between the two pieces allowing the egg white to fall out while keeping the yolk intact.  You can have a bowl waiting underneath to catch the egg white.

2.  Whisk the egg yolk and the lemon juice in a stainless steel bowl until it has doubled in volume.

3.  Place the bowl over a saucepan with barely boiling water.  If you have a double boiler you could of course use that instead.  Don't allow the water to touch the bottom of the bowl and constantly whisk the mixture.  You don't want the egg to get too hot or it will start to scramble.

4.  Add in the melted butter and continue to whisk until the mixture has again doubled in volume.

5.  Remove the bowl from the heat and whisk in the cayenne pepper and salt.  I love cayenne pepper so I usually add a bit more.

6.  While you are doing steps 1 through 5 you can also be working on the simple parts of this recipe.  Toast the piece of bread.  Scramble the remaining egg - you can add in the leftover egg white if you so choose, salt, and pepper etc.  Cook the piece of bacon as well.

7.  Now it's time to put everything together!  Top the bread with the scrambled egg.  Crumble the piece of bacon and add that as well.  Cover with as much shredded cheese as you would like.  Then pour the hollandaise sauce over everything.

8.  Enjoy!

I hope everyone has a great Friday!

Wednesday, January 4, 2012

T.A.A.F.O.M.F.T.

These are a few of my favorite things...


I love my Nick and Nora bedding!  I bought these sheets a few years back from Bed, Bath, and Beyond.  They are so pretty that I almost don't want to cover them up with a comforter!  It's 19 degrees right now and the road outside of my window is covered with snow and it's still coming down.  Currently it's about 2:15 in the morning and once I've finished typing this post I'll be climbing into these warm and cozy flannel sheets under my down comforter :) 


Happy Tuesday everyone!

Tuesday, January 3, 2012

Project of the Month: The House of Miniatures Chippendale Canopy Bed / Circa 1750 - 1790


David's sister Lisa sent me some amazing HOM miniature kits for Christmas and I am so excited to start putting them together.  The first one I have begun working on is the Chippendale Canopy Bed / Circa 1750 - 1790.  Below is a description of the bed frame that was included in the assembly and finishing instructions:

"This type bed was also known as a "bedstead", meaning wooden frame with mattress.  Although a few high-post bedsteads in the Queen Anne style have been found in our country, the story of fine American bedsteads really begins at about 1735 with those having square block feet or ball and claw feet in the Chippendale style. The high-post bedstead became an article of elegance in our country, as it was in England, with the increase in wealth and the building of fine houses.  The wood used in finer bedsteads in America was generally mahogany."


I used a hemp beading board and straight pins to hold the pieces together while the tacky glue dried and of course a level to measure how straight my work was along the way.  First I put the four base pieces together.


Next I glued the two side rails and the end rail.


While the glue was setting I used a drill and the pattern provided to drill holes for the string that will later support the mattress.


Next I glued the two part corner posts and the block feet.  I also centered and glued the headboard to the frame.


Next I assembled the canopy frame.  There were two side pieces and four middle slats.  My two middle pieces are just a little off, but once the canopy is covered in fabric no one will notice.


Next I added the four corner posts.  This was by far the most difficult part.  I worked for a long time to get everything level.


Next I turned the bed upsidedown and glued the canopy frame on.  The above picture shows all of my progress so far.  My next step will be deciding what color stain to use.  Then of course stringing the bed and deciding on fabric for the bedding.

More updates coming soon!  Until then happy Wednesday everyone! :)